FOLLOW MY METHOD TO CONFIDENTLY LINE A TIN WITH GLUTEN-FREE PASTRY…
This little tutorial shows you how to line a pie tin with gluten-free pastry. It will help you to avoid the rips, splits and tears that sometimes appear when handling pastry.
The pictures and detailed descriptions below will take you through a five-step process to lining and lidding a 20cm (8″) round sandwich tin with gluten-free sweet pastry.
You may find it useful to read through the whole tutorial a few times before lining your tin with pastry.

STEP ONE: PREPARE YOUR WORK SURFACE
Line your worksurface with enough clingfilm to cover an area just larger than the size you want to roll your pastry to.
Place your ball of chilled* pastry in the middle and then place more clingfilm over the top.
*For best results, lift your pastry from the fridge around 15mins before you want to use it (but don’t skip or shorten the initial chill time!)
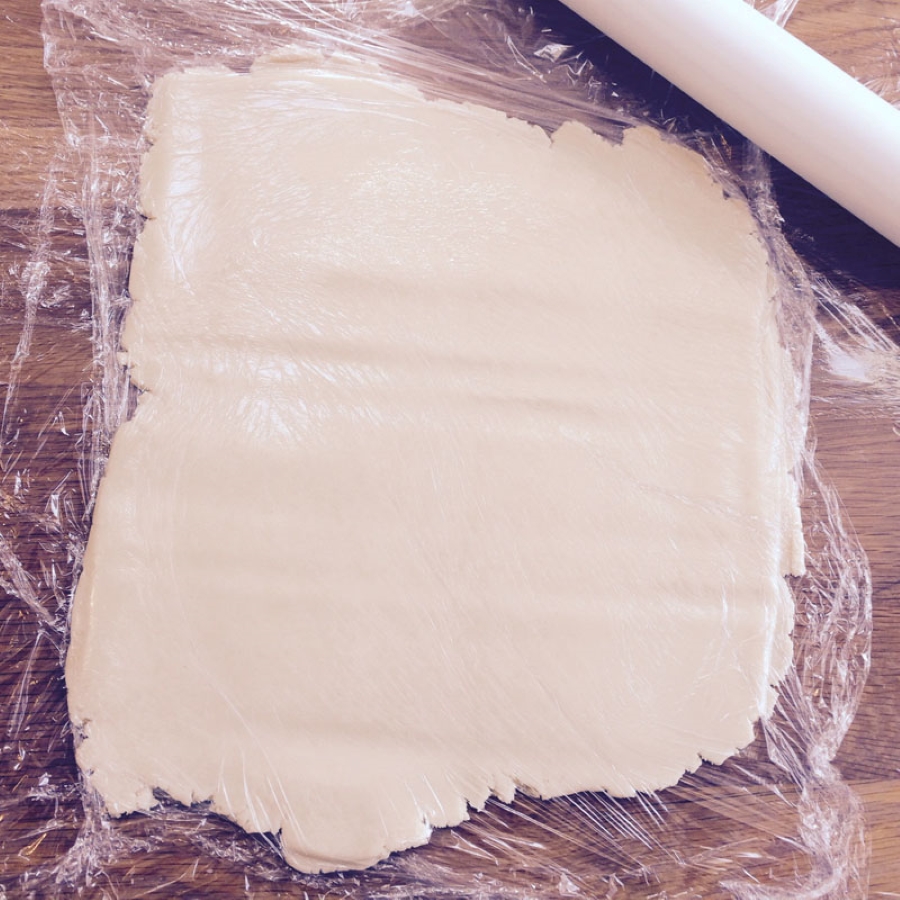
STEP TWO: ROLL OUT YOUR PASTRY
To line a 20cm (8″) sandwich tin, I use a 650g ball of pastry. Our gluten-free sweet pastry mix makes up roughly 800g pastry.
Roll your pastry out between the two sheet of clingfilm until it is the right size and thickness.
I use a set of green (4mm) rolling pin spacers for this type of pie.
You will need to roll to a length and width of around 27.5cm (11″).
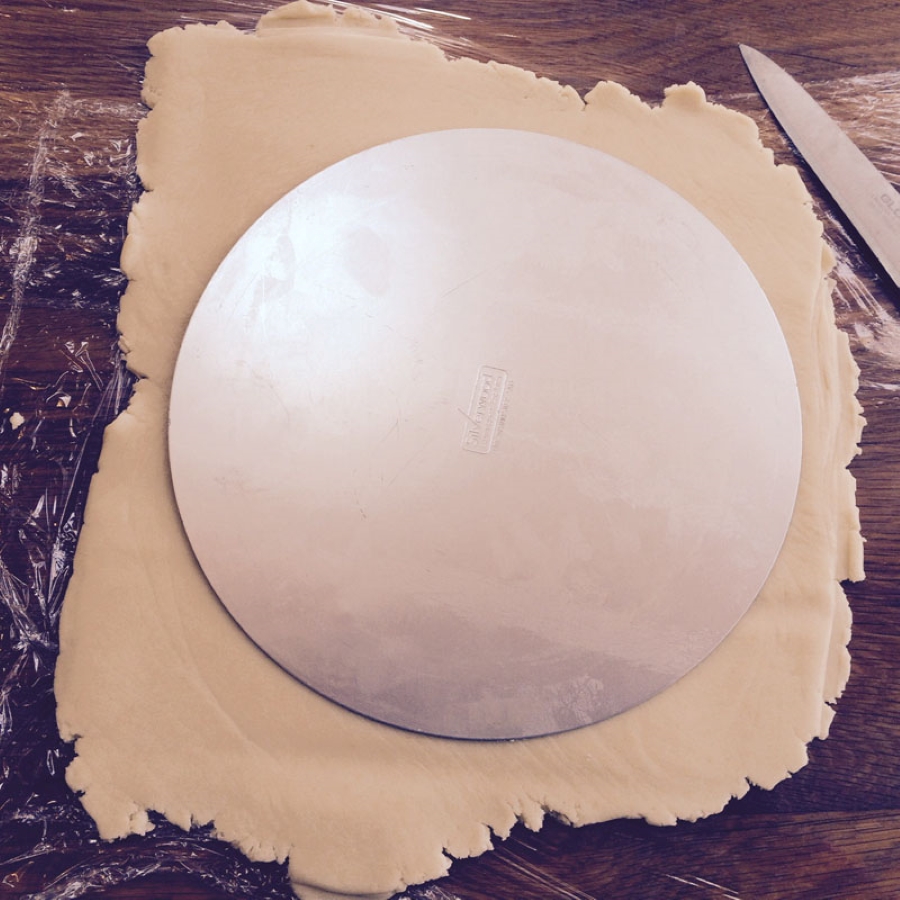
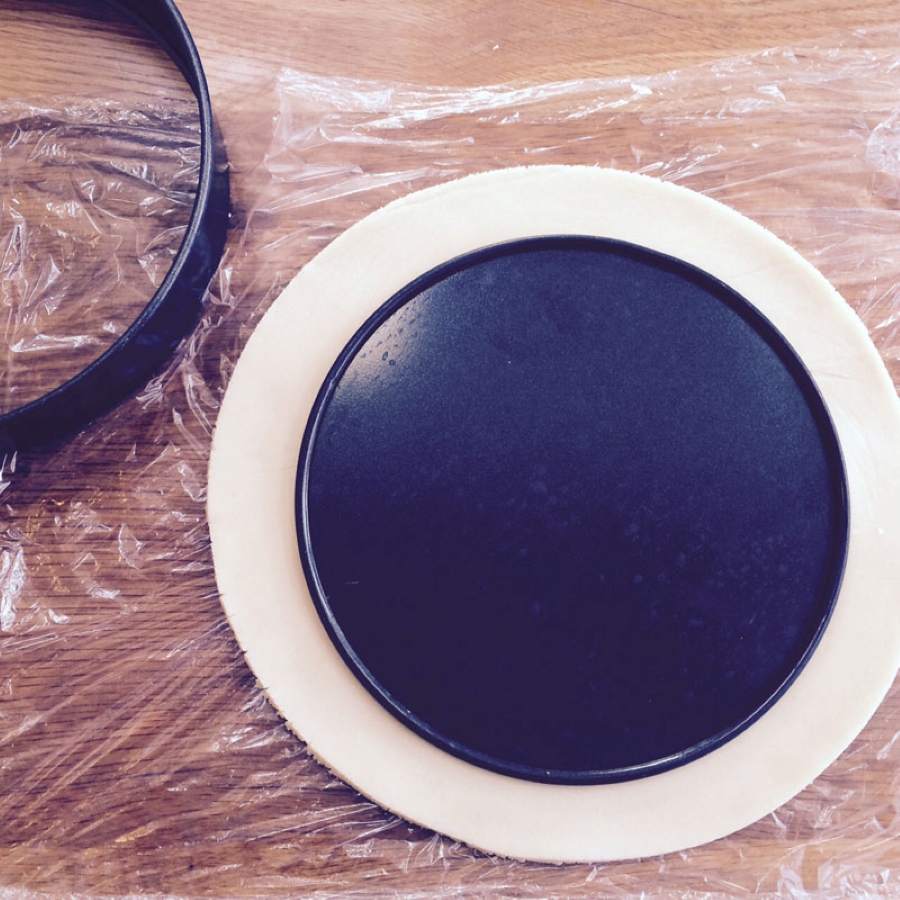
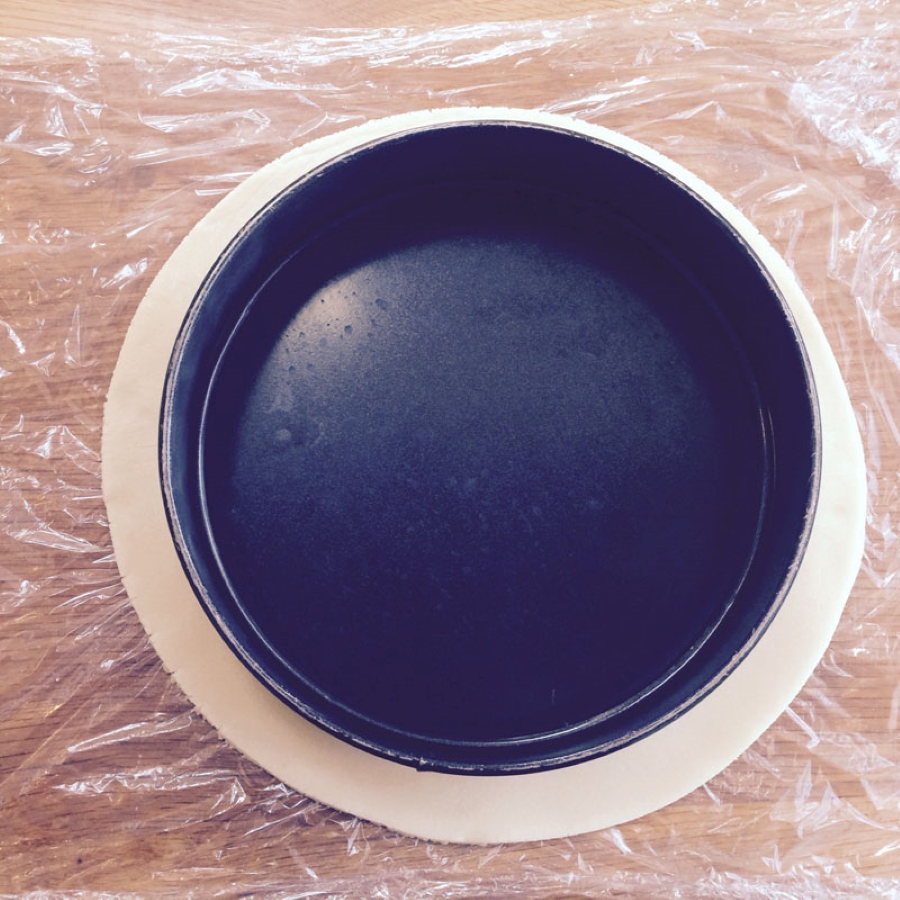
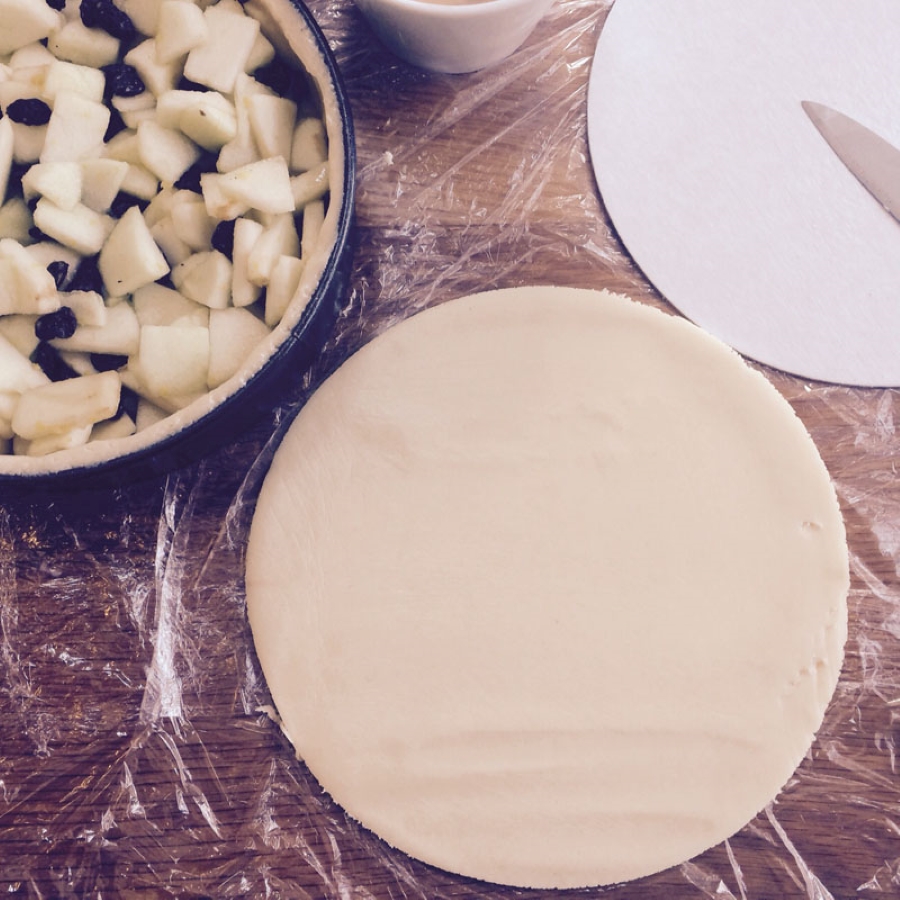
STEP THREE: CUT YOUR BASE
Remove the top layer of clingfilm and gently place a 25cm (10″) circle on top of your pastry. Mine is the base of a cake tin, but you could use a plate or a circle of baking paper if you don’t have a 10″ cake tin.
Cut around the circle with a knife.
Gather up the pastry trimmings (which you will use for the lid) and carefully remove the cutting circle you placed on top of your pastry.
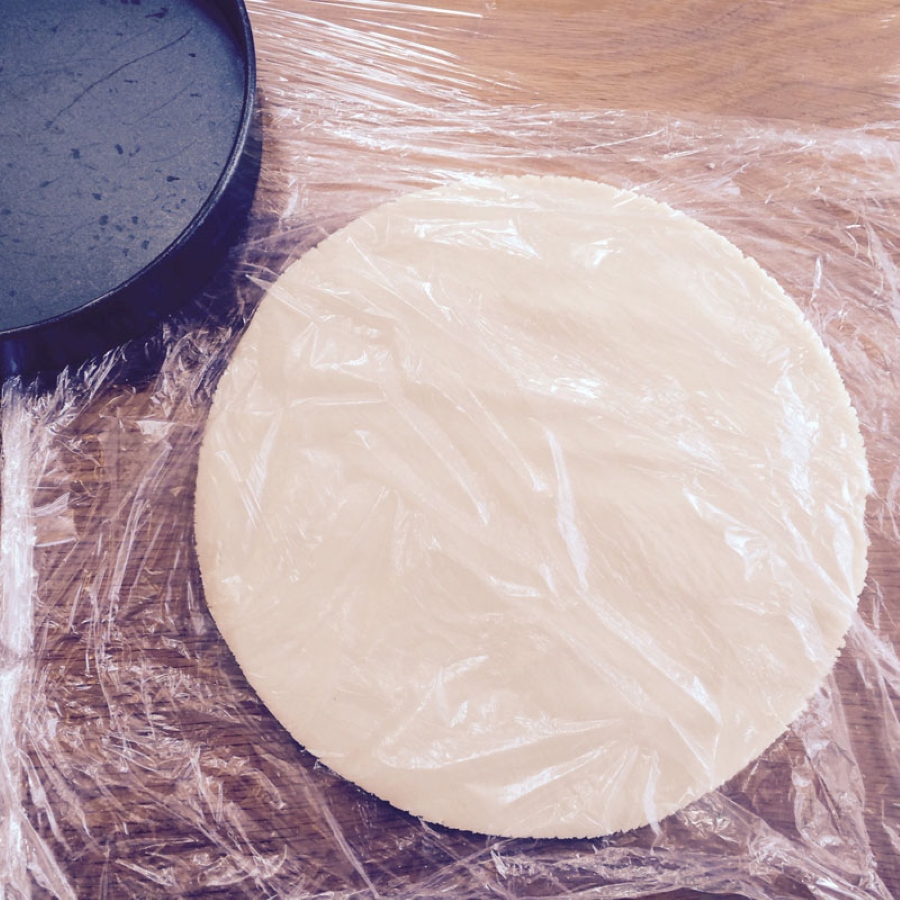
STEP FOUR: LINE THE TIN
Place the top layer of clingfilm back over your pastry circle then slide one hand underneath the bottom layer of clingfilm. Place the other hand on the top layer.
Quickly but carefully flip the pastry over and place it back down on your work surface. Remove the top layer of clingfilm (which was the bottom!)
This is simply to loosen the pastry from the worksurface, making it easier to lift again when you move it to the tin.
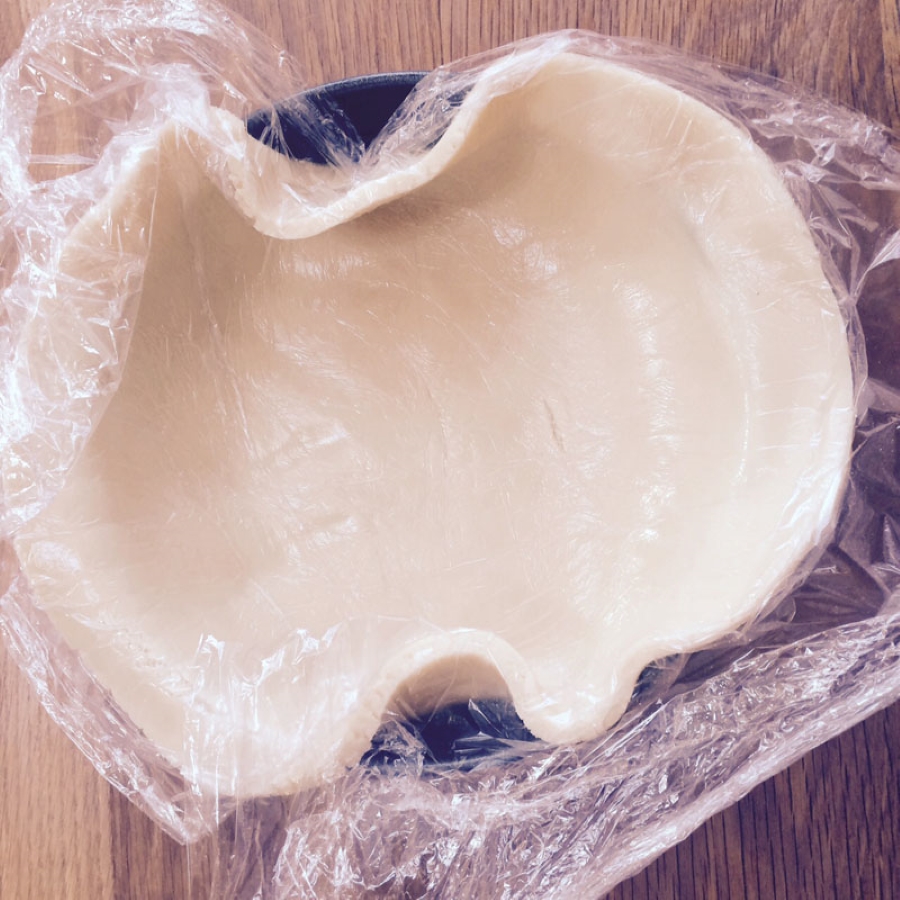
STEP FOUR: LINE THE TIN…
Leaving your pastry on the worksurface, place the base of your sandwich tin in the centre of the rolled out pastry. If, like mine, your base has a rim on one side, you want this rim facing up towards you.
Now place the wall of the tin gently in place over the base of the tin. You need to have the bottom of the tin wall facing up towards you.
You need the base and wall facing this way so that you are definitely lining the inside of the tin!
STEP FOUR: LINING THE TIN…
Now place your hand, wrist and the lower part of your arm over the sandwich tin. Slide your other hand under the clingfilm on your worksurface.
Now, in one swift movement, flip the tin over and put it down on your worksurface.
This action will result in the base dropping to the bottom of the tin, taking the pastry with it.
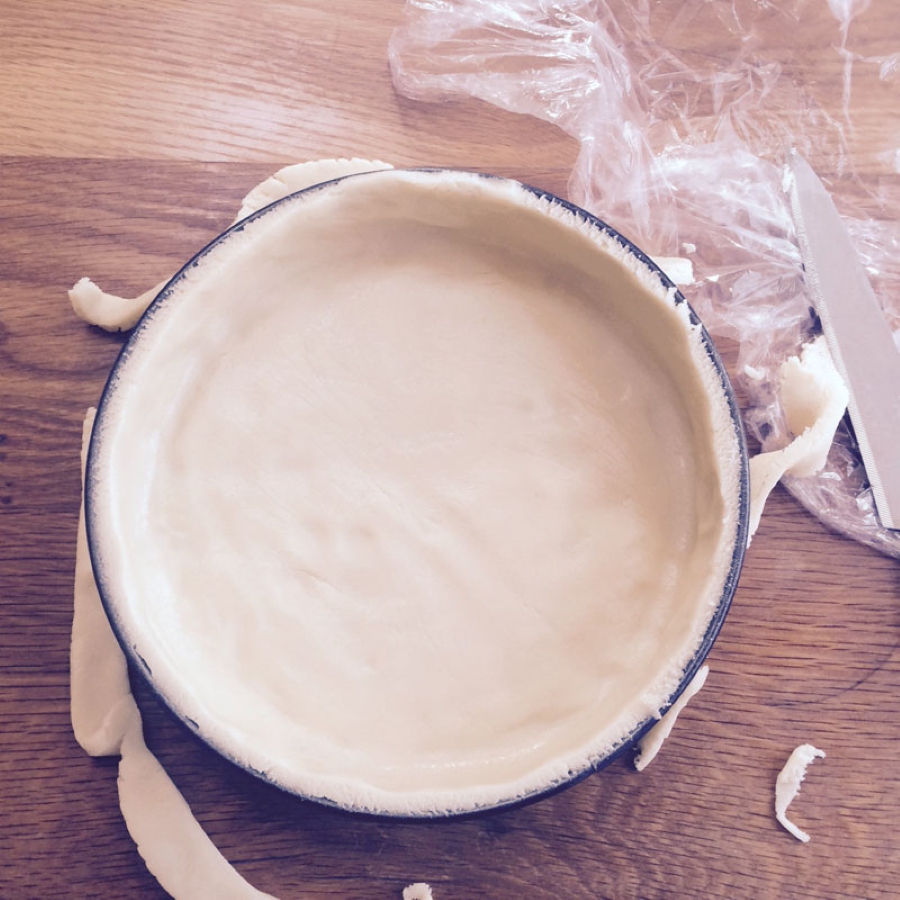
STEP FOUR: LINING THE TIN…
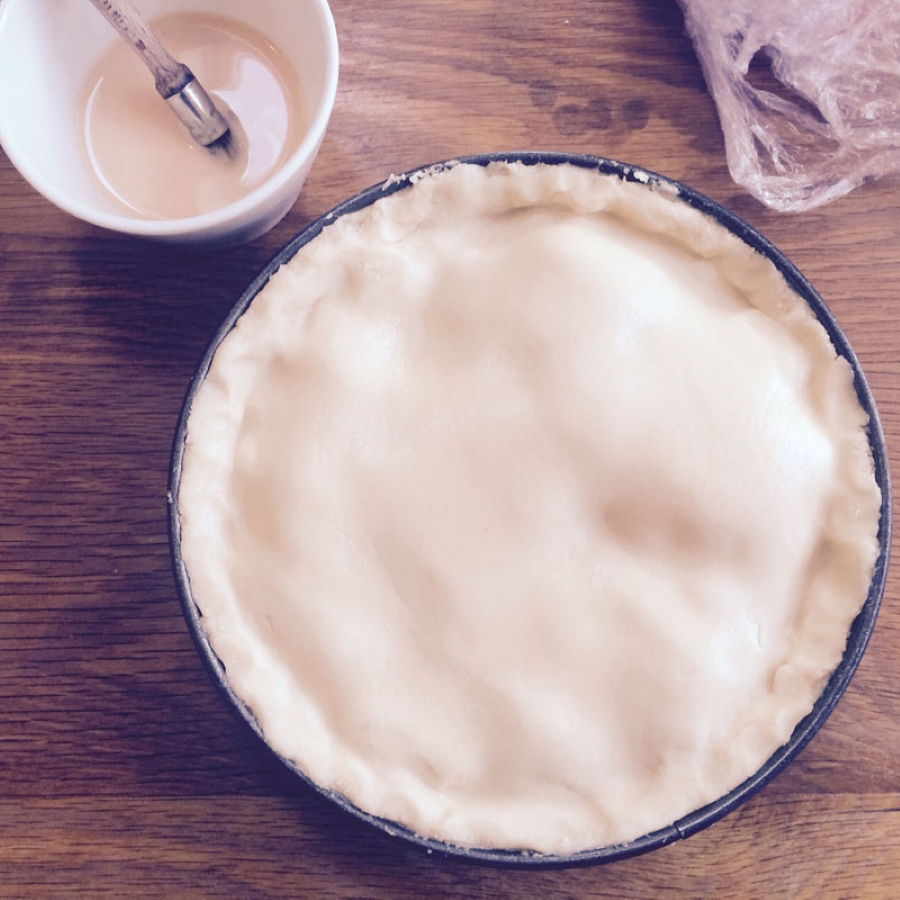
Leaving the clingfilm where it is for the time being, gently press the pastry into the base and around the walls of the tin so that it sits flush with the tin and there are no gaps.
Gently peel the clingfilm away from the pastry then use a sharp knife to trim away the excess pastry. This will leave you with a nice neat rim at the top of the tin for your pastry lid to attach to.
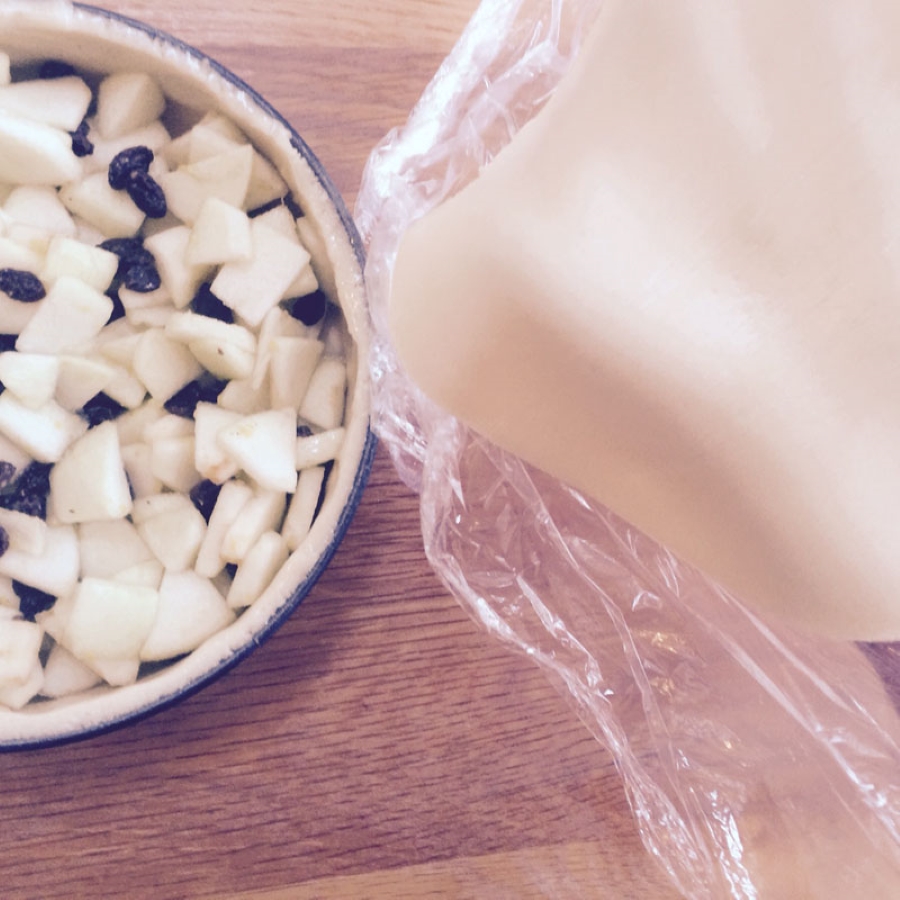
STEP FIVE: MAKING AND ATTACHING THE LID
Set your beautifully pastry-lined tin to one side so that you have enough space to make the lid.
Prepare your worksurface in the exactly the same way you did in step one.
Roll the remainder of your pastry out so that it is at least 22.5cm (9″) in diameter. Remove the top layer of clingfilm.
STEP FIVE: MAKING AND ATTACHING THE LID…
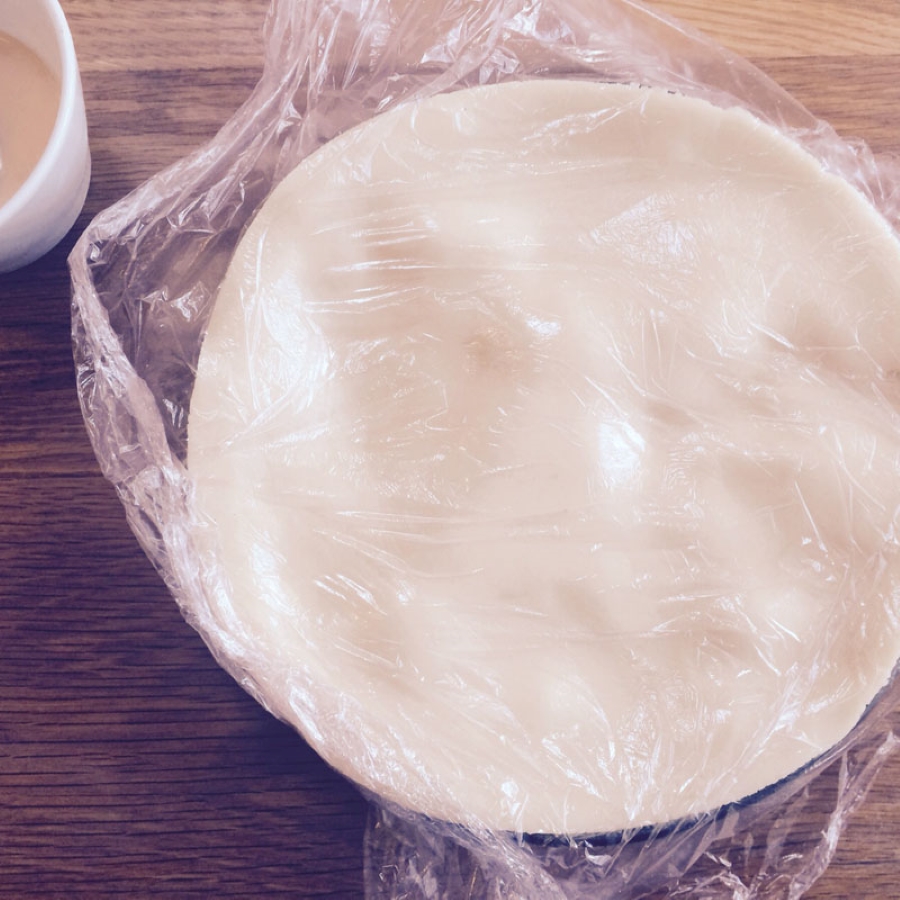
Place a 20c, (8″) circle gently on top of the pastry. Cut around the circle, removing any offcuts (which you can use to decorate the top of your pie if you are feeling creative).
Fill your pastry-lined tin with your filling of choice and now you are ready to attach the lid.
STEP FIVE: MAKING AND ATTACHING THE LID…
Crack an egg into a small bowl and lightly beat it with a fork. Lightly brush the egg around the rim of the pastry to give your lid something to stick to.
Slide your hand under the clingfilm that is underneath your pastry lid. Position your hand so that the rim of the pastry lid is right next to the edge of the tin.
With one swift movement, flip the pastry lid over onto the top of your tin.
STEP FIVE: MAKING AND ATTACHING THE LID…
You can make slight adjustments at this stage by gently wiggling the clingfilm if your flip was slightly off centre 😉
Once you’re happy with the alignment of your lid, carefully peel away the clingfilm. Using your fingertips, press the edges of the lid into the rim to create a seal.
AND FINALLY
Congratulations! You now have a delicious gluten-free pie waiting to be baked and devoured 🙂
Egg wash your pastry lid for a lovely golden finish. Bake according to the instructions in your recipe, then kick back and enjoy the fruits of your labour 😍
Happy baking!